If you’ve listened to a podcast anytime over the past few years, you’ve likely heard of Squarespace. As one of the more unique website builders in the game, Squarespace is mighty. In using it to create your website, it can get pretty overwhelming.
In this Squarespace Tutorial, we will provide you with a step-by-step guide you can use to be sure your Squarespace website experience goes well.
What is Squarespace?
Squarespace is an NYC-based company founded in 2003. Like all great companies, this one was in tight quarters. Namely, the dorm room of Anthony Casalena, where the company hit $1 million in revenue with him being the only employee.
Since its release, Squarespace has been behind the scenes of millions of sites. It has also grown to a team size of over one thousand, where it has been repeatedly recognized as one of the best places to work.
How To Start With Squarespace: Step-By-Step
Step One: Selecting a Website Template

Squarespace immediately throws you into selecting a website template. You can sort through them by topic and site type.
Site types include the following:
- Online store
- Portfolio
- Membership site
- Blog
- Scheduling
- One page (i.e., sales funnels)
Squarespace also provides you with different template options depending on your topic. You can also sort by popular design or choose the “all templates” option if you don’t want to feel the restrictions.
It’s easy to be overwhelmed at this point. Remember that we will go through how you can change this template later. However, there is a lot to be inspired from here, so look through the complete list (when you can) to ensure you get what you want.
If you do not want to bother with it, pick one and move on.
Wait, What About Signing Up?
Squarespace integrates with existing platforms like Google or Facebook to make signing up easier. We recommend using Google to create your Squarespace account, making it easier to integrate with tools later down the line.
Example tools include the following:
- Google Search Console
- Google My Business
- Google Analytics
- Google Keyword Planner
Step Two: Using The Website Editor
Focusing on design, Squarespace immediately starts off your website building experience by going to edit mode. You are encouraged to do the following:
- Select a store name
- Learn how to edit pages
- Create pages
- Select your site styles
We will go through these four steps below:
Selecting a Name for Your Site Title

Whether a freelance designer or an eCommerce specialist, your site name is your brand. Selecting an engaging site name is essential, as it will also be your domain name.
Like similar website builders, you will receive a free custom domain when you pay for services. Your domain should match your site name.
Here are some tips you can use for naming:
- Use keywords (if possible)
- Make it short and punchy
- Make sure it is unique
- Build it from your brand
Editing Your Pages
The left-hand navigation bar allows you to switch between different aspects. To edit pages, you will click the “pages” link.
Clicking on that will reveal two headings:
- Main navigation (what people usually see)
- Member areas (assuming you are making a membership-driven site)
To start editing, click on one of the options under either heading and click edit just to the right of the navigation bar. From there, click on any text or image you see on the screen.

You will see what options you have for editing different block sections. For example, copy sections enable you to change the font, add a list, and take it from body text to different header levels.
Double-clicking any pictures will enable you to replace what you see and add alt-descriptions. You can also choose to click the trash-can button to remove the images.

You can also drag images and text blocks around to align blocks by columns. We recommend playing around with it, but the visual editor is why people go to Squarespace site.
When done, you can click on the “done” button in the upper-left-hand corner, choosing to discard or save changes. This will not automatically publish your site.
Creating New Pages and Navigation Features
To create a new page, go back to the last location just before editing. Clicking the “plus” button enables you to add a new page. Next to the “main navigation” section will automatically appear on the site header.
You can also choose to upload pages based on different categories:
- Blog
- Store
- Collection (for portfolios)
- Events

You can also choose page layouts from the designer selection by clicking on the page and selecting “add section”, which includes additional options:
- Privacy Policy
- Appointment pages
- Terms of Service
- FAQs
- Menu
- Customer reviews

You can also add external links to your header and a folder. “Folders” add drop-down menus to your navigation, which can be helpful for busy sites.
Editing Your Site Style
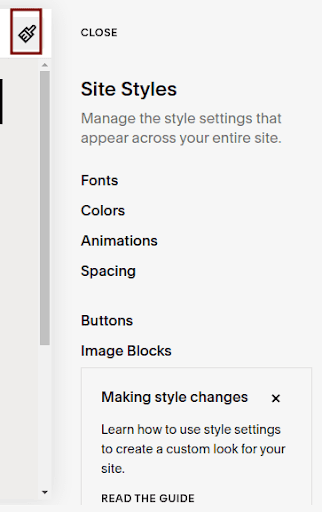
The upper-right-hand corner of all your edit screens will show a paintbrush. This brush enables you to modify the overall design aspects of your website:
- Fonts
- Color
- Site transition animations (i.e., switching between different pages)
- Image Block changes (text alignment, overlap, button separation, etc.)
- Buttons
Changes made here apply to the whole site, another valuable aspect of the WYSIWYG editor (What You See is What You Get).
Additional site style edits can be found under the “design” section, returning to the hub of your site editor. The design header includes improvements to the following pages:
- Browser icon
- Lock screen
- Checkout page
- Custom 404 page
- Access denied screen (like if you have a member section of your site)
- Social sharing logos
- Custom CSS (for those who have coding knowledge)
Step Three: Establishing Your Ecommerce Features
Because Squarespace is not only an eCommerce site provides, you’ll find the commerce tab third on the dashboard. Clicking on it will prompt you to give details about your store.
If you previously had an Etsy store, you can easily import it by linking your account. However, you will need to manually move over data if you have products in other stores. You can also import data from Shopify or Big Cartel.
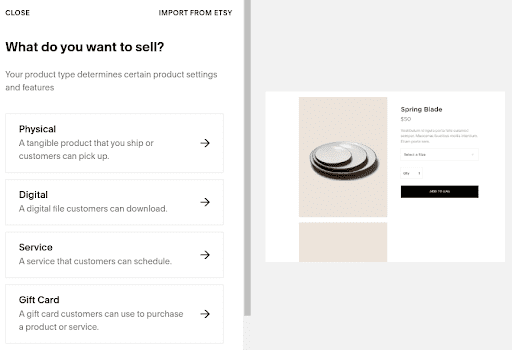
You start adding a product by clicking “add product” in the center of the screen. From there, you have the option to select your product type:
- Physical
- Digital
- Service
- Gift Card (for other purchase types)
You have the option to enter your Store Name, which is what appears in the navigation bar. “Store” usually works if you are out of ideas.
After selecting your product type, you are instructed to insert the following information:
- Title
- Description
- Additional Info (in the form of blocks and content on your product page)
- Images
- Price
- Is it on sale?
- Quantity
- SKU (Stock Keeping Unit for tracking inventory. It is auto-generated if you do not insert a number)
- Variants (i.e., different shirt colors if you sell clothing)
- Categories and Tags (ways to group different product types)
- Visibility (is it hidden?)
- Is it a featured product? (seen at the top)
- Other related products
- Whether you want to show Etsy customer reviews
Additional aspects include applying SEO and a unique URL that makes searching for your product more accessible. You can also have custom checkout buttons, forms, and the ability to set up a subscription.
After submitting your first product, the “add product” button will be moved to the upper-right-hand corner. You can also familiarize yourself with bulk uploading using Squarespace’s CSV template.
Step Four: Adding How To Get Paid and How To Ship Products
Regarding payment gateways, Squarespace integrates with three known processors:
- Stripe
- Paypal
- Square (If you offer point-of-sale transactions)
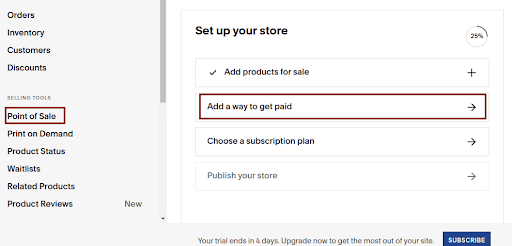
You can also choose the currency type (defaulted to USD) on the gateway selection screen. To do so, you can click on the “Add a way to get paid” link under the dashboard.
Because Squarespace doesn’t emphasize being an eCommerce platform, it doesn’t offer as many payment processors. If you already work with an existing company and cannot move, you might want to look elsewhere.
Does Squarespace Help with Shipping?
The shipping table allows you to add various shipping options. You can find this after clicking on the commerce menu under “setup.”
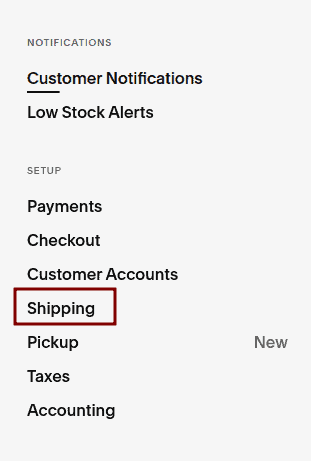
Shipping calculation offers three options:
- Flat rate
- Weight
- Calculated by FedEx, UPS, or USPS
Selecting the best shipping method depends on the product you need to send. If it is abnormally heavy or has unique properties, you might want to check with your local shipping centers to get a specific estimate.
Step Five: Important eCommerce Features
Below are some additional eCommerce features unique to Squarespace:
- Print on Demand – You can integrate your website with Printful and Printique, two services known for handling delivery and inventory management for you.
- Waitlists – In situations where you wait for restocked inventory, Squarespace allows you to establish waitlists.
- Product Reviews – You can ask for product reviews on Squarespace and show reviews on your pages.
- Notifications – You can set up custom notifications when you have low inventory. You can also direct those notifications to your customer, allowing them to receive notices of changing factors regarding their order automatically.
Familiarize yourself with the whole eCommerce dashboard. You’ll find yourself using these tools often, so understanding where to go is essential.
Step Six: Using Squarespace Marketing Tools

The marketing tab is another area where Squarespace does well. This page enables you to address the following needs:
- Draft, review, and schedule regular emails through email campaigns. Create mailing lists of your subscribers or add sender profiles manually based on information gathered elsewhere.
- Use Squarespace SEO features to determine how people see you online through site titles and meta descriptions. Follow the SEO checklist for further tips on site discoverability.
- Location management will automatically establish and manage where you operate, connecting to Google My Business for local SEO and reputation management.
- Handle automated promotion campaigns through Instagram, Facebook, and Pinterest. You can also sell products on Instagram and publish stories alongside those products.
Understanding how to use marketing tools is one way to increase exposure and subscribers. Proper handling of Squarespace email campaigns is one way to boost your earnings by providing direct value to your customer’s inboxes.
A comprehensive marketing approach is necessary. By supplementing this through Google Ads, you will have a solid strategy.
Other Important Features You Should Consider Using
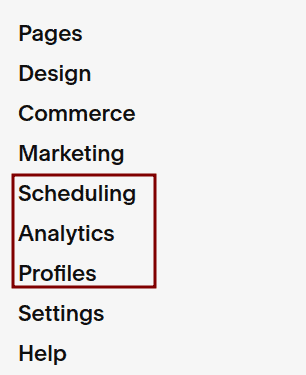
Below are some other aspects you should consider taking advantage of:
- Squarespace Scheduling – Allow clients to schedule time with you using an integrated online assistant. It comes with a free 14-day trial but costs an additional $15 a month (on top of the regular subscription)
- Squarespace Analytics – Alongside Google Analytics, Squarespace has a built-in analytics tool to make valuable tracking. This can help you develop buyer personas, allowing more effective advertising based on existing knowledge.
- The Squarespace App – Track your site using real-time data using the Android or iOS versions of Squarespace analytics.
- SEO Specialist – You can hire a specialist in SEO using the internal platform.
- Customer Profiles – Find out subscribers, customers, potential leads, donors, and members using the profile section. Develop different marketing emails depending on what category your target falls into.
Squarespace Pricing

If you’ve decided that Squarespace is right for you, here are the different plans they offer:
| Plan | Monthly Cost | Monthly Cost (if paying annually) |
| Personal | $19 | $14 |
| Business | $26 | $18 |
| Commerce (Basic) | $36 | $27 |
Commerce (Advanced) | $65 | $49 |
All plans come with SSL security, unlimited bandwidth, and available templates. You can integrate unlimited contributors (staff members) if you pay for a business plan or higher.
All plans also include Squarespace extensions, which have different resources and templates. Squarespace isn’t that great at exposing this part of their site, so use it if you have it.
As you might imagine, eCommerce features are limited to commerce plans. Local POS starts at the basic plan, but features like custom CSS and abandoned cart recovery are limited to the advanced program.
Final Thoughts – Is Squarespace Worth It?
Squarespace is an excellent website builder when it comes to friendly design choices. The beautiful template designs are primarily free, making them far more appealing than most sites.
Beyond that, it is effortless for you to create a unique template. The drag-and-drop system makes it easy to adjust the design. However, when it comes to a flexible commerce platform, it does have some catching up to do when compared to sites like BigCommerce.
Benjamin Shemesh is an ecommerce enthusiast and a digital marketing expert.
He loves surfing the ocean
